
Introduction
Most homeowners get camera placement roughly right on the first try. Months later they realise the side gate or rear laneway was never actually covered, usually while scrolling footage that shows everything except the moment that mattered.
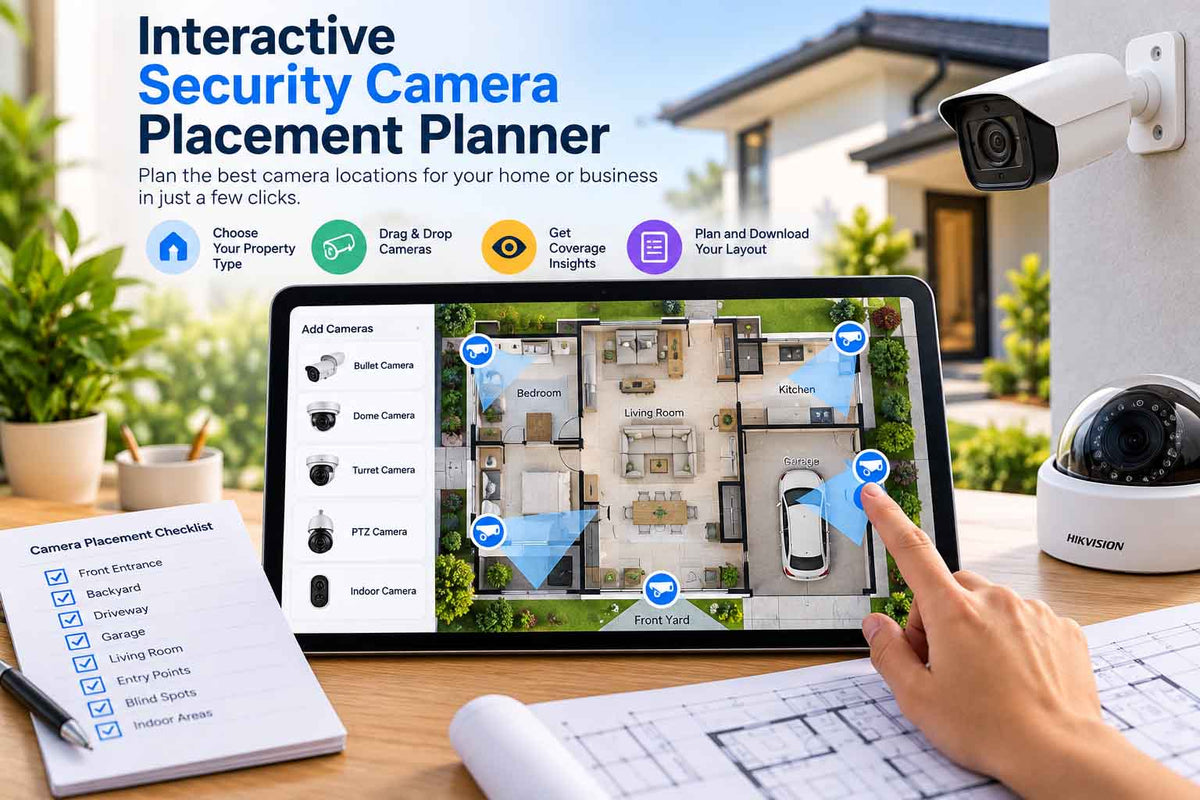
Knowing where to place security cameras is less about the number of cameras and more about the order you cover things in. Use the planner below to map your property, see where each camera should go, and check your priority order before you buy anything.
CCTV Camera Placement Planner
Select the areas you want to monitor and get a simple recommendation for camera count, camera type, recorder size and storage needs.
1. Choose the property type
2. Select areas to monitor
Your suggested CCTV setup
| Area | Suggested Camera | Priority |
|---|---|---|
| Select areas to generate a placement plan. | ||
Tip: Start with entrances, driveway and rear access points before adding extra indoor or storage cameras.
[Interactive planner tool embeds here]
Prefer paper? Download the free placement guide PDF ([PDF link]): a two-page printable with a mapped example home, mounting heights, lens and night mode guides, and a blind spot checklist.
TL;DR
• Cover in this order: front door and driveway, then side gates, then the back door and rear boundary, then garage and outbuildings, then blind spots.
• Mount at 2.4 to 3m with a 15 to 30 degree downward tilt. Higher than that and you record hats, not faces.
• Lens matters: 2.8mm for doors and yards (faces within about 6 to 8m), 4mm for driveways and long fence lines.
• Night mode by position: full colour out the front, smart hybrid down the sides, infrared on the rear fence and near neighbours.
• Most homes need 4 to 6 cameras. Corner blocks, laneways and pools push that to 6 to 8.
Where to Place Security Cameras: Priority by Zone
The planner ranks positions the same way an installer would on a site visit. Here is the reasoning behind each priority.
Priority 1: Front entry and driveway
This is where parcel theft, car break-ins, door knockers and most visitors happen, so it gets covered first and best.
• Front door camera: mount under the porch eave, slightly off to one side, aimed so faces fill the frame as people reach the door. A 2.8mm lens identifies faces within about 6 to 8m.
• Driveway camera: aim down the driveway from the house or garage, so people and cars approach the camera rather than crossing the frame side to side. A 4mm lens gives more detail at the street end.
• Night mode: full colour works well here if there is a streetlight or porch light. Colour footage is what makes a car or jacket describable later.
A wide overview camera won't reliably read number plates at any resolution. If plates matter, add a dedicated ANPR camera mounted 0.5 to 2m high, within 15 to 20 degrees of head-on and 3 to 8m from where vehicles slow down.
Priority 2: Side access points and gates
Side paths are the usual way into the backyard because they are out of sight from the street. They are also the most common gap we see in finished systems.
• Mount the camera on the house wall looking towards the gate, so anyone coming through walks into the frame face-first.
• Cover the full length of the path, not just the gate. Someone can climb the fence halfway along.
• If a neighbour's bedroom window sits close by, use infrared or a smart hybrid camera so no light spills next door.
Priority 3: Rear boundary and back door
If your property backs onto a laneway, reserve, creek path or railway line, the rear fence becomes a priority 2 position, because those are common after-dark access routes. The planner bumps it up automatically when you tick that option.
• Aim the rear camera along the fence line rather than straight across it, so it covers more of the boundary.
• Infrared works best here: there is usually no lighting, and a white light facing a reserve achieves little.
• Cover the back door and sliding doors with a separate wide camera that also catches where the side paths meet the backyard.
Priority 4: Garage and detached structures
Garages, carports, sheds, granny flats and studios hold the things that walk off most often: bikes, tools, mowers and fishing gear.
• Cover the roller door and any side door. Angle the camera slightly away from the street so car headlights do not wash out the night footage.
• For a detached shed or studio, mount the camera on the house looking at the outbuilding door, or on the outbuilding looking back down the path.
• Pool gates belong here too. Use privacy masking to block out neighbouring yards.
Priority 5: Blind spots
Once the main zones are covered, walk the property and look for gaps created by fencing, garden beds, water tanks and parked cars. Common ones:
• The corner between the side gate camera and the back of the house
• Behind tall hedges or garden beds under windows
• A car parked in the driveway that blocks the view of the front door or garage
• Under carports, where headlights blind the camera
• Second entrances such as a rear lane gate or granny flat door
For weatherproofing and night vision detail on outdoor positions, see our best outdoor security cameras guide.
Height, Angle and Lens: Getting Each Position Right
Mounting height
Mount security cameras at 2.4 to 3m on a typical single-storey home. That is high enough to be out of easy reach, but low enough to capture faces rather than the tops of hats and hoods.
• Below 2.4m: the camera can be covered, knocked off target or pulled off the wall.
• Above 3m: faces disappear under caps. This is the most common mistake on double-storey homes, where cameras get mounted on the upper eave because it is easy to reach from inside the roof.
• Double-storey homes: mount ground-floor cameras on the lower eave, a pergola beam or a wall bracket, not the second-storey gutter line.
Angle
• Tilt cameras down 15 to 30 degrees. A level camera records sky and glare.
• Avoid pointing a camera at the horizon to the east or west. Sunrise and sunset will flare the image at the times people leave and come home.
• Keep eaves, gutters and walls out of the edge of the frame. At night they bounce infrared back into the lens and wash out the picture.
Lens and identification distance
Resolution gets the attention, but the lens decides how far away you can identify someone.
|
Lens |
Field of view |
Identify faces to |
Best positions |
|
2.8mm |
About 100 to 110° |
About 6 to 8m |
Front door, back door, side paths, small yards |
|
4mm |
About 90° |
About 10m |
Driveways, gates, rear fence lines |
|
Panoramic (180°) |
180° |
Short range |
Wide backyards and corner blocks, as an overview |
|
PTZ (zoom) |
Variable |
Long range when zoomed |
Acreage, long driveways, yards and car parks |
Identification figures are manufacturer DORI reference distances for 6MP cameras: the Uniview IPC3616LE 2.8mm identifies at 6.3m and the HiLook IPC-T561H 4mm at 10m. Lighting and mounting height change real-world results.
Turret cameras are our default for homes because they are easy to aim and less prone to spider webs than domes. Bullet cameras suit long driveways and visible deterrence, and PTZ cameras make sense on acreage.
Overlap and coverage
• Let neighbouring cameras overlap slightly at their edges, so a person walking around the house is always in at least one frame.
• Check that every path between the street and the backyard passes through at least one camera's identification zone, not just its wide view.
• Place the recorder (NVR) inside, hidden or locked away. A recorder by the front door can be taken along with the footage.
Example Camera Plans by Property Type
|
Property |
Typical cameras |
Positions |
Recorder |
|
Townhouse or unit |
2 to 3 |
Front door, garage or carport, rear courtyard |
4-channel |
|
Standard suburban block |
4 to 6 |
Front door, driveway, both side paths, back door, plus garage if detached |
4 or 8-channel |
|
Corner block |
6 to 7 |
All of the above plus the second street frontage |
8-channel |
|
Backs onto laneway or reserve |
6 to 8 |
Standard plan plus the rear boundary and any rear gate |
8-channel |
|
Acreage or large block |
8+ |
House, sheds, gates and a long driveway, often with 4mm or PTZ cameras |
16-channel |
Planning tip: buy one recorder size bigger than today's plan if you think you may add a camera later. Moving from 4 to 8 channels costs far less upfront than replacing a full recorder in a year's time.
Common Placement Mistakes
1. Mounting too high. Second-storey eaves are convenient to wire but turn faces into hats.
2. Watching the yard instead of the entry. A wide camera over a big lawn shows that something happened, not who did it.
3. Crossing the driveway instead of looking down it. People cross the frame in a second and never face the camera.
4. Ignoring the side paths. Most finished systems we review still have one uncovered side.
5. Pointing into the sun. East and west-facing cameras aimed at the horizon flare twice a day.
6. IR next to eaves or walls. The reflection blinds the camera at night.
7. Recording the neighbours. Keep cameras off neighbouring windows and yards, and use privacy masking. It avoids disputes and keeps you on the right side of state surveillance laws.
Not sure about your layout? Our security consultation service designs camera placement around your actual property plan.
Recommended Setup
A flexible-count system suits a whole-property plan, because coverage needs vary from house to house. The Uniview 6MP Smart Dual Light PoE CCTV Kit lets you choose 5, 6, 7 or 8 cameras on one 8-channel recorder, so you can match the camera count to the positions your plan turns up.
|
Feature |
Detail |
|
Cameras |
5 to 8 × IPC3616LE-ADF28KM-DL 6MP turrets, 2.8mm lens, 102.73° view |
|
Recorder |
NVR501-08B-P8-IQ, 8 built-in PoE ports, 4K HDMI output |
|
Night vision |
30m Smart IR and 30m warm light in every camera |
|
Detection |
Human and vehicle detection, cross-line and intrusion alerts |
|
Weather |
IP67, rated -30°C to 60°C |
|
Price |
From $1,099 for 5 cameras (October 2026). Hard drive sold separately |
The dual-light design is what makes it flexible for a mixed plan: the same camera runs infrared on an unlit rear boundary and switches to warm light for colour footage at the front door. Every camera has a 2.8mm lens, so on long driveways, pair it with a 4mm camera on one of the spare channels.
If your plan has 4 or fewer positions, this kit is more than you need. Look at our Uniview 6MP kits for 4-camera options. For plans over 8 cameras, you'll need a 16-channel recorder.
Download the Free Camera Placement Guide
Use this free PDF guide to plan where to place security cameras around your home, including entrances, driveways, side paths, backyards, garages and other key areas.
Download Free PDF GuideCamera Placement FAQs
Where is the best place to put security cameras on a house?
Start with the front door and driveway, then the side gates, the back door and the rear boundary. Mount cameras on the house at 2.4 to 3m, looking towards each entry point so people walk into the frame face-first.
How high should security cameras be mounted?
Around 2.4 to 3m with a 15 to 30 degree downward tilt. Lower than 2.4m invites tampering; higher than 3m records the tops of heads rather than faces.
How many security cameras do I need for my house?
Most suburban homes need 4 to 6. Corner blocks, properties backing onto a laneway or reserve, and homes with a pool or detached studio usually need 6 to 8.
Should cameras face the street?
Point driveway and front door cameras along the driveway and path rather than out across the street. That keeps faces and cars in focus, and avoids recording passers-by and neighbours unnecessarily.
Can I point a camera at my neighbour's property?
Avoid it. Aim cameras at your own entry points and use privacy masking to block out neighbouring windows and yards. Surveillance laws vary by state, and cameras that record audio face stricter rules in some states.
Do I need a different lens for my driveway?
Often, yes. A 2.8mm lens identifies faces within about 6 to 8m. For a long driveway or a gate further from the house, a 4mm lens extends that to about 10m.
Plan It, Then Match It to a Kit
Use the planner to map your property, print your plan, and check each position against the guide PDF. Once you have mapped your priority positions, browse our Uniview 6MP kits and IP cameras to match a camera to each position on your p


